Monthly Archives: November 2023

4-way kickstart switcher

Positive growth.

Nature, in the common sense, refers to essences unchanged by man; space, the air, the river, the leaf. Art is applied to the mixture of his will with the same things, as in a house, a canal, a statue, a picture.

But his operations taken together are so insignificant, a little chipping, baking, patching, and washing, that in an impression so grand as that of the world on the human mind, they do not vary the result.

The sun setting through a dense forest.
Wind turbines standing on a grassy plain, against a blue sky.
The sun shining over a ridge leading down into the shore. In the distance, a car drives down a road.

Undoubtedly we have no questions to ask which are unanswerable. We must trust the perfection of the creation so far, as to believe that whatever curiosity the order of things has awakened in our minds, the order of things can satisfy. Every man’s condition is a solution in hieroglyphic to those inquiries he would put.

ATTENTION: All pictures refer to an Amiga 500 Rev.6A. If you own a different board revision or a different Amiga, then the positions on the photos will differ! In case of doubt or basic questions, please send a short email to info@retrobuddys.com with the exact model / revision BEFORE installation. Please always carry out installations/removals on an ESD mat with potential equalization. Never stand on a (polyester) carpet during installation. If no professional chip puller tool is available (see photo) Please lever out the chips *carefully* with a small electric screwdriver from both sides at the same time. Never lever out one side first and then the other! This can (will…) damage the chips of your Amiga. In case of crooked legs, straighten the chip *carefully* on an ESD mat with little pressure. If a leg is crooked/clenched *very carefully* press the leg straight with very small pliers/tweezers. If you have no installation/conversion experience at all, we will be happy to install the parts you have purchased from us at a flat rate of €30 plus 2*postage and provide a functional warranty. We assume that you know how to open your Amiga! If you have any difficulties with this, please send an e-mail to info@retrobuddys.com As soon as you have opened your Amiga, please remove the existing Kickstart Rom from the socket and align it (small notch, round dot, semicircle on the chip side). Normally the notch on an Amiga 500 Rev 6a points to the rear of the connection ports. Now you can insert the 4-way Kickstart Switcher into the socket. The alignment of the notch should correspond to the alignment on the mainboard. The cables are usually aligned towards the rear of the connection ports. You can now either route the two switches through the flaps of the side expansion port or carefully drill 2 holes in the housing of your Amiga. Please note that there are different versions of the switcher for the different Amiga 500 motherboard revisions (Rev.5, Rev.6a). For earlier versions than 5a there is *no* working switcher and with the Rev 8/Amiga 500+ you have to solder on the mainboard, as important resistors were not fitted from the factory. If you need further hardware mods, a Gotek drive, a complete Amiga, a PiStorm or just cables, please contact us. With your next order in our webshop www.retrobuddys.com you will receive free delivery with your personal voucher code 8ybykhw9. If you are missing something in the webshop, please ask by e-mail (info@retrobuddys.com). We have *almost* everything for your Amiga 500, 600, 1000, 1200 and 2000.

4MB Amiga 600 FastRam extension

4MB Amiga 600 FastRam extension

In case of doubt or basic questions, please send a short e-mail to info@retrobuddys.com BEFORE installation.

Download Amiga TestKit by Keir Fraser => https://github.com/keirf/amiga-stuff/releases/download/testkit-v1.20/AmigaTestKit-1.20.zip

Please always carry out installations/removals on an ESD mat with potential equalization. Never stand on a (polyester) carpet during installation.

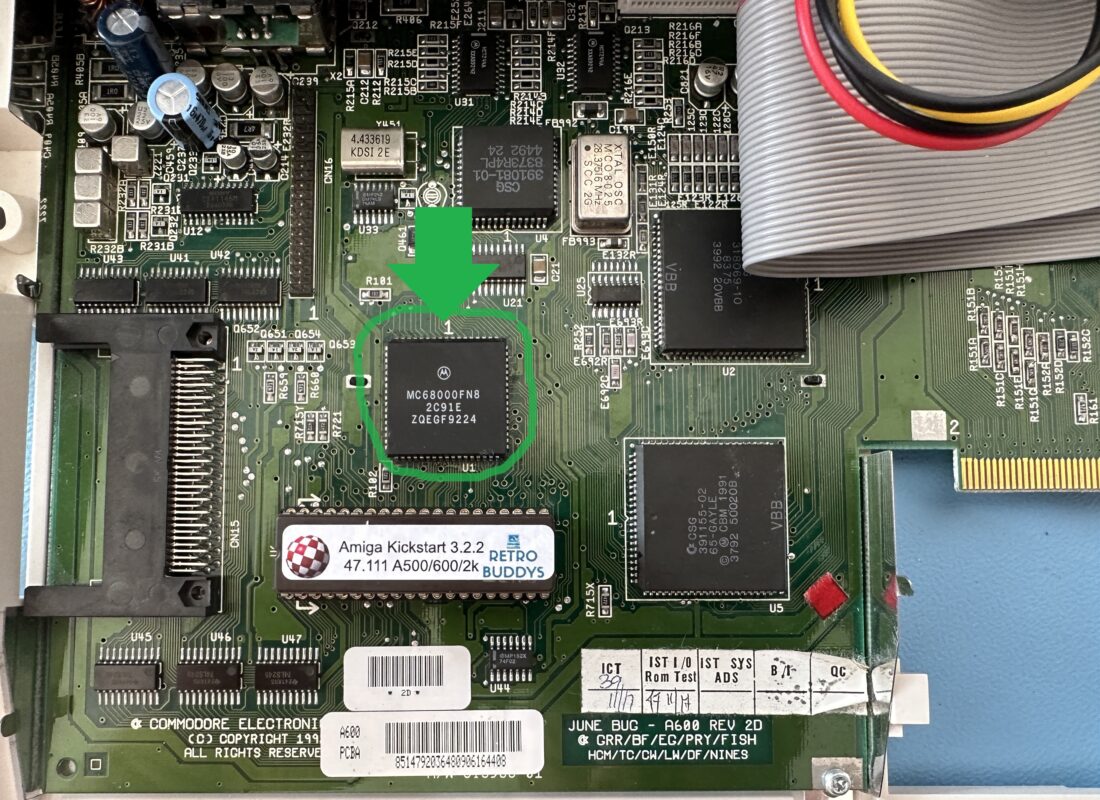
You are now ready to install the expansion into your A600, but before you do, we recommend cleaning the CPU pins with contact cleaner or isopropyl alcohol and a toothbrush or cotton swab, as they have probably accumulated all sorts of gunk/lint/etc. over the years.

Allow the CPU to dry well and then place the extension on the CPU in the correct orientation and press it down firmly until it feels firm. No effort should be required.

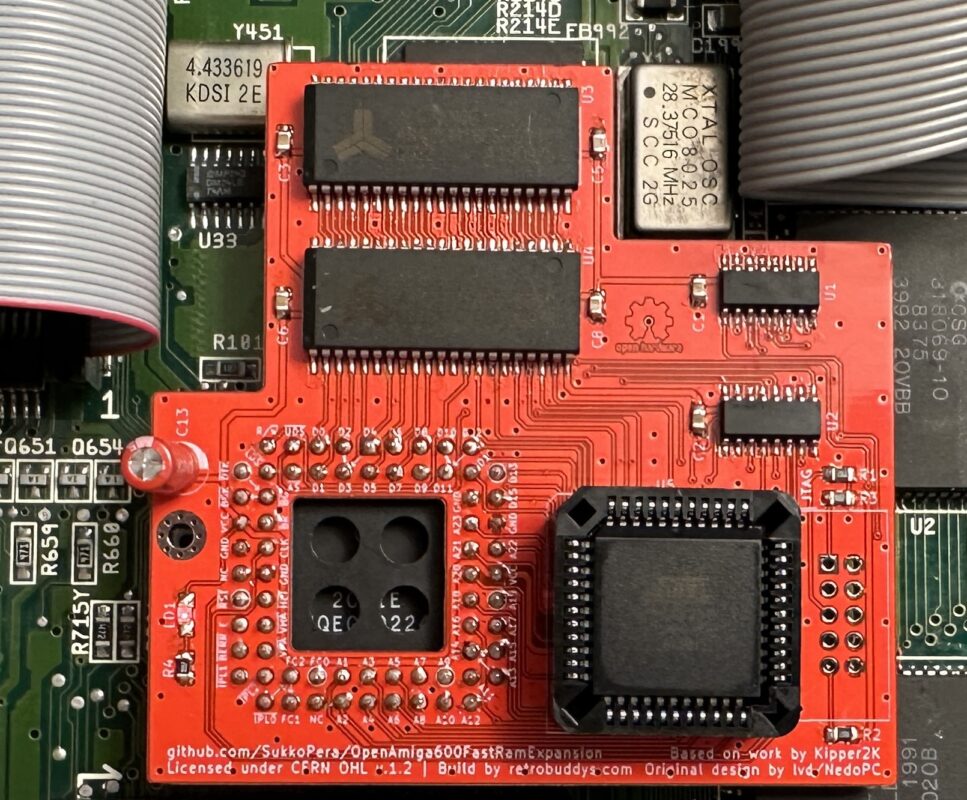
The socket on the memory expansion is modified and the chip is actually inserted there and not plugged in from above. Therefore, please do not constantly insert and remove it, otherwise the socket will wear out very quickly. If possible, do not shake, turn or place the computer horizontally after installation.

Before you reassemble the case, we recommend running Amiga TestKit. Use the memory option (F1), 4 MB Fast RAM must be displayed. Then start the memory test (F1 again) and let it run for 20-50 cycles: If the TestKit does not find any errors, the memory expansion is seated correctly. If errors occur, switch off the computer and try to fit the extension better by pushing it further down or turning it slightly back and forth.

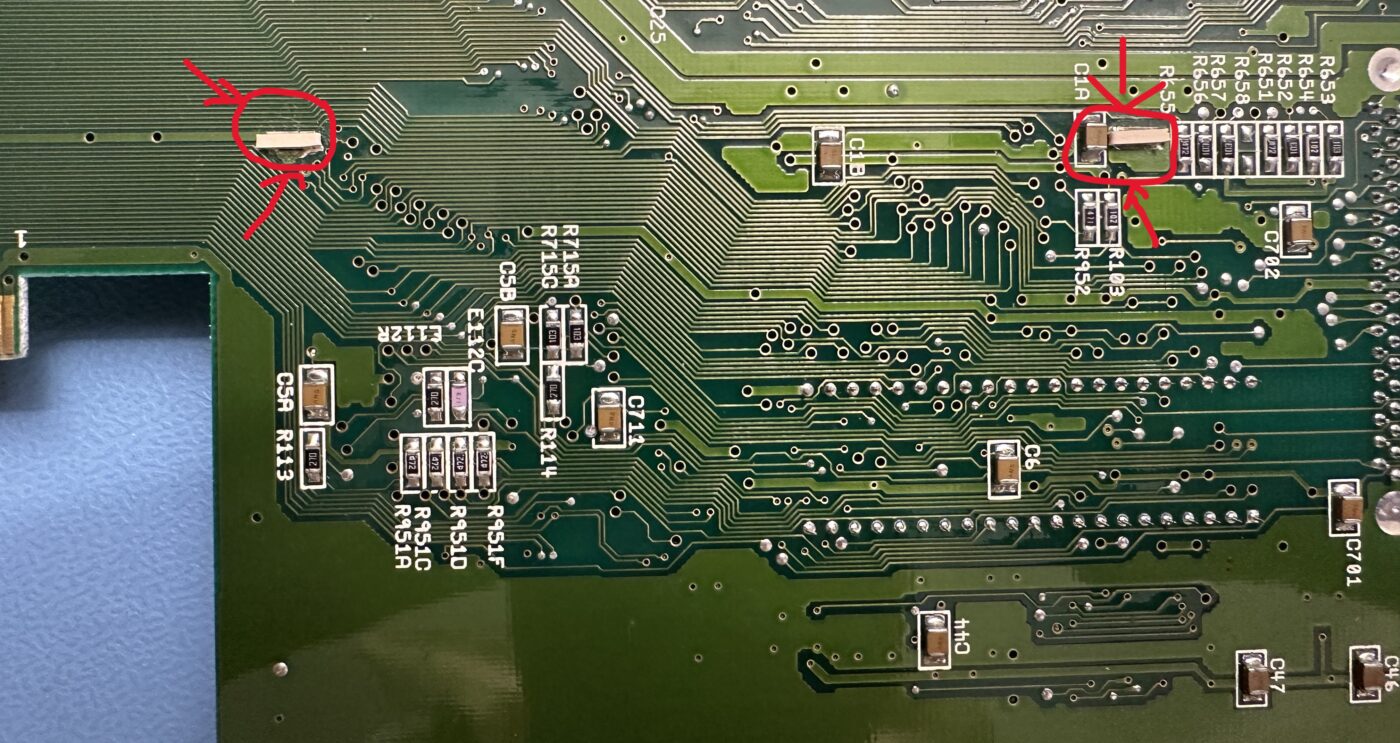
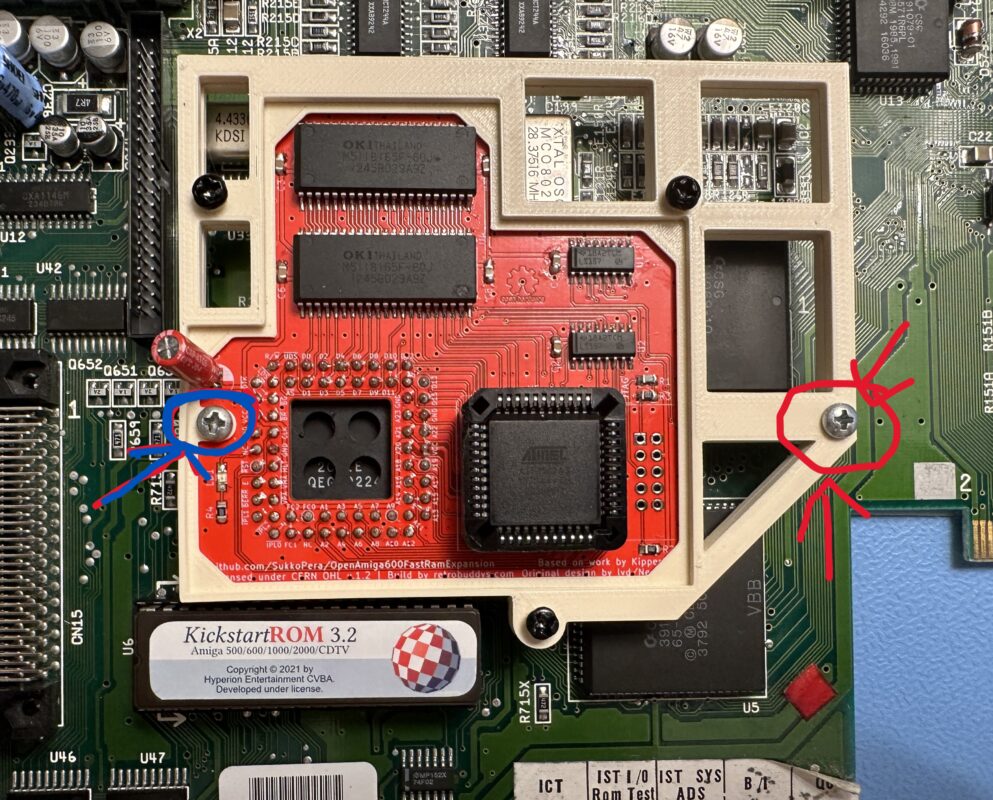
It can happen that the card slowly moves out of the base over time. To avoid this, you can anchor it to the motherboard using the hole to the left of the CPU, which should match one of the holes for the feet of the hard disk bracket.

Note that, as already mentioned, the PLCC socket is not intended for this type of use, which means that the contact quality deteriorates a little each time the board is inserted or removed. So try not to remove them unnecessarily. If you notice that the contact has deteriorated so much that the machine is no longer stable, the base must be replaced.

Each memory expansion has been extensively tested by us and has been written, read and verified for at least 50 cycles with the “Amiga Testkit” without errors.

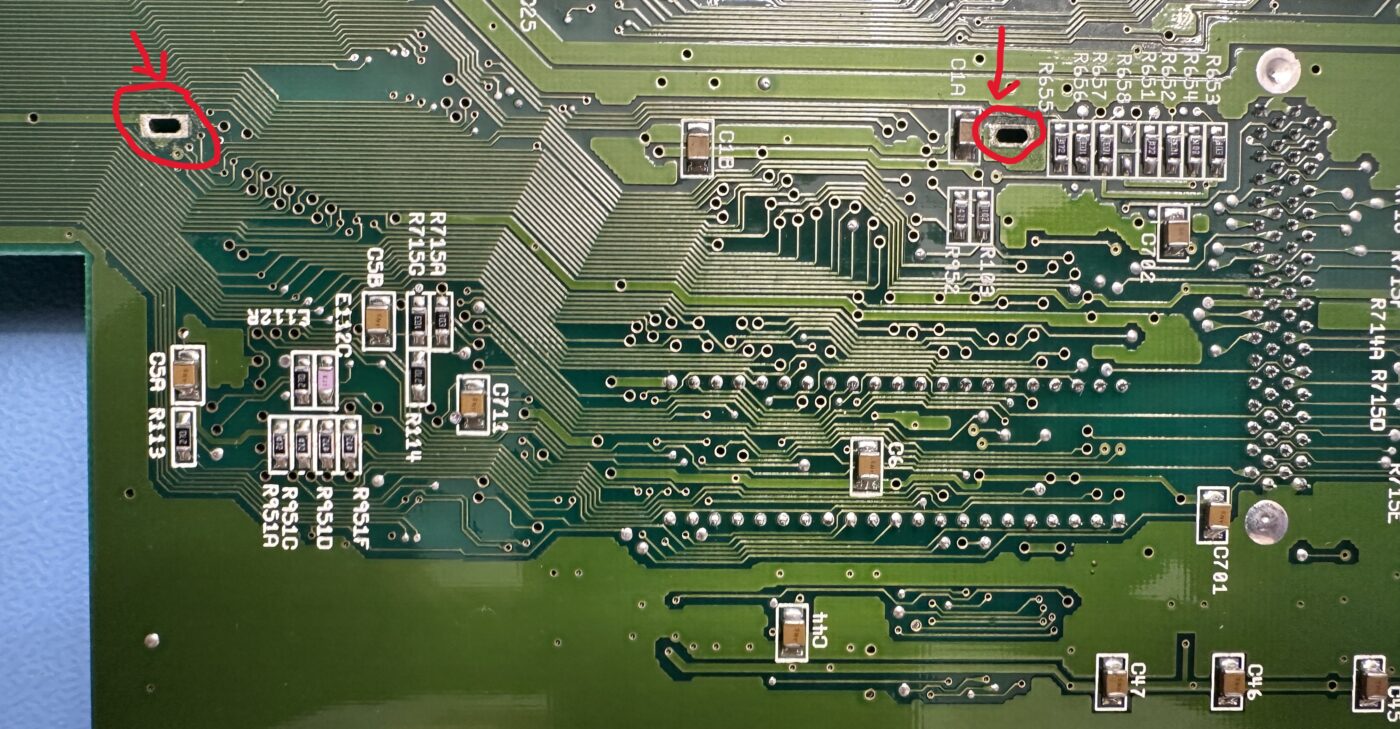
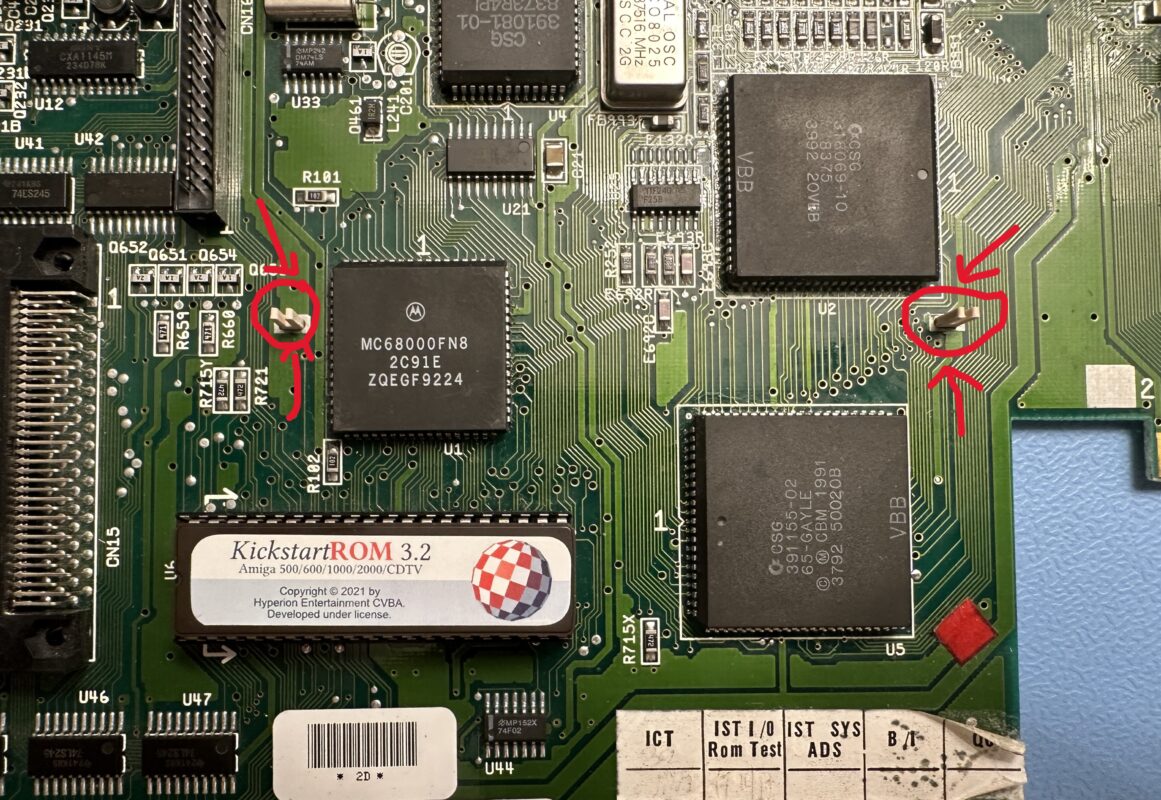
If you have received the 3D frame from us for mounting the memory expansion, you must first remove the mainboard from the housing. Then turn to the back and look for the 2 rectangular holes.

Please insert T-shaped pins into these holes. If they are too wide, please sand them down carefully with some sandpaper. For safety, we have included 2 sets consisting of pins and spacers.

If you have not received a mounting frame, then you have a memory expansion with a very strong socket from AMP which does not detach from the CPU even when you lift your Amiga by the memory expansion and you therefore do not need a frame.

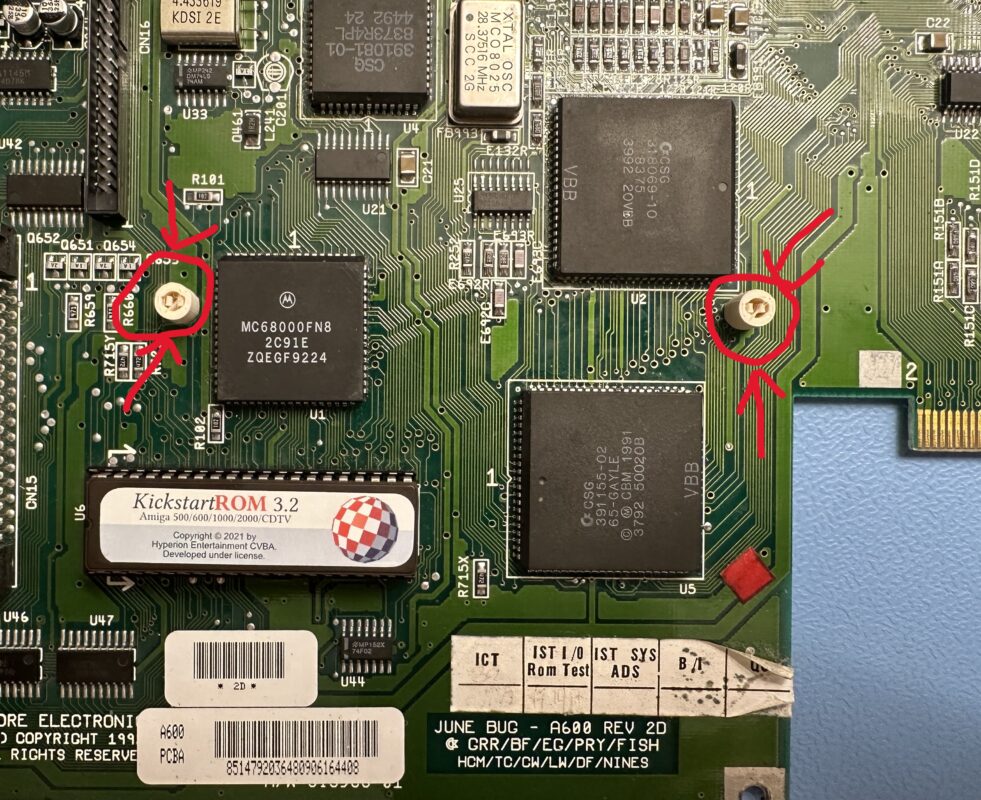
Please turn the mainboard over.

Now you have to attach the round spacers with the rectangular side.

Finally, please attach and press on the memory extension and tighten it carefully with the screws supplied. Please remember that the frame is made of PLA plastic and breaks off easily.

After solid always comes from 😊

Before you reassemble your Amiga 600, please test it once with the Amiga test kit.